This is the first and most essential step in setting up your cart message. In this tab, you define when, where, and how the message should appear, what conditions trigger it, and whether it includes advanced features like countdown timers.
Schedule Message:

- Start Date:
This feature allows you to specify both the date and time at which the Cart Message should begin appearing. - Expiration Date:
You have the ability to set the exact date and time when the Cart Message will no longer be displayed.
Display Options:

Choose where the message will be displayed. By default, the message is shown on the cart page. However, by enabling these options, the admin can also display the message on the product page and the checkout page.
- On Checkout Page:
Toggle this option to display the cart message on the checkout page. - On Product Page:
Toggle this option to display the cart message on the product page.
Cart Message Criteria & Product Selection:
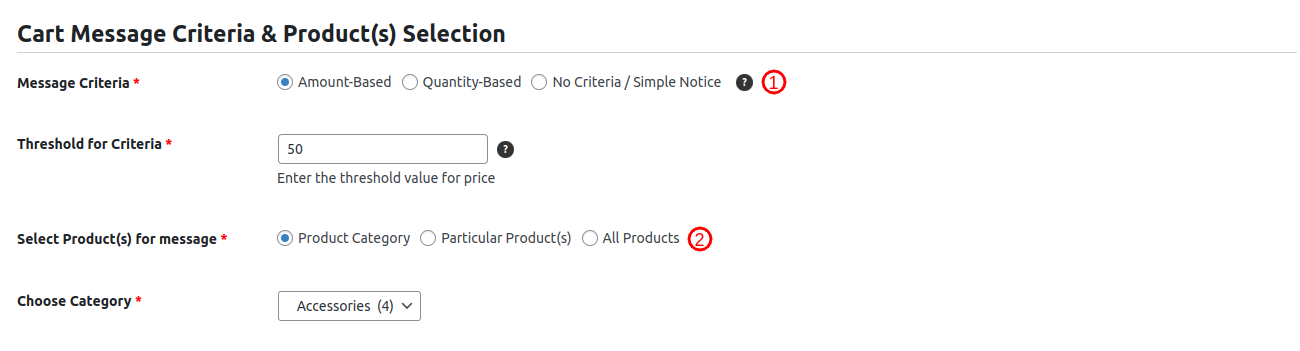
- Message Criteria: This setting allows the admin to choose the type of cart message and whether it is linked to a threshold. The threshold value is set in the Threshold for Criteria field, which determines the required cart amount or quantity needed to trigger the message succession.
- Amount-Based : Displays a cart message that dynamically updates based on the total cart amoun.Suitable for offers like “Add $40 more to get free shipping!”
- Quantity-Based : Displays a cart message that adapts to the changing quantity of items in the cart. Suitable for offers like “Add 9 more items to unlock a 20% discount!”
- No Criteria / Simple Message: This option Creates a static, unchanging cart message with no applicable threshold.
- Show Product(s) for messages: This setting allows the admin to choose when to display the cart message. Options are as follows:
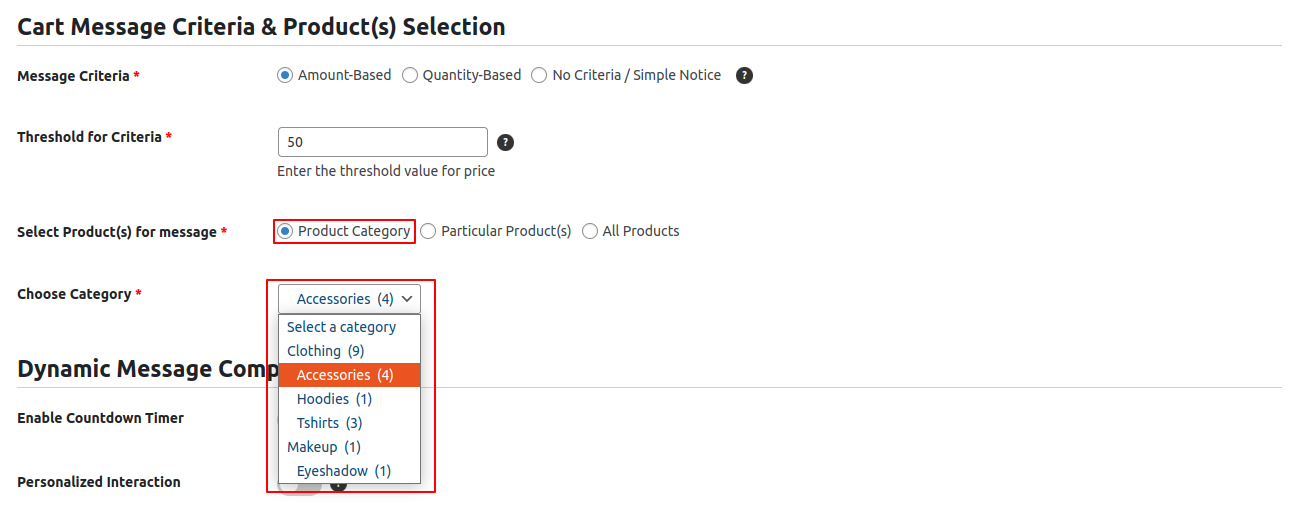
- Product Category: Look for the ‘Choose Category’ dropdown in the next field. It lists all the available product categories. When you choose one, the selected setting applies to all the products in that category.
-
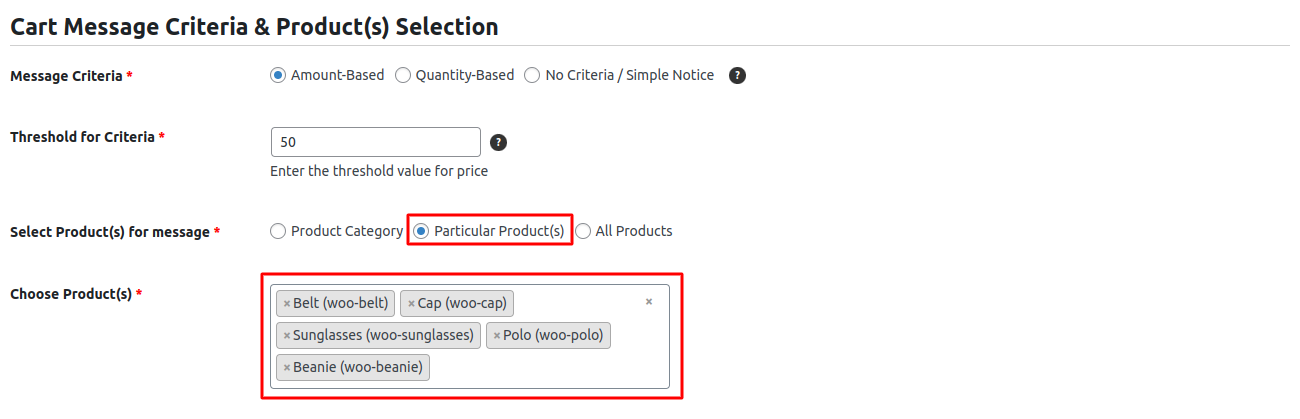
- Particular product(s) : In the field next to it, you’ll see the ‘Choose Product’ dropdown, which lists all individual products and allows you to select a single product or multiple products.
-
- All Products : This setting allows the admin to display the cart message for all products in the store. Selecting this option ensures that the message applies universally across the entire product catalog. If the admin has enabled ‘Include Out-of-Stock Products’ and ‘Include Discontinued Products’ in the global settings, the cart message will also be displayed for those products.
Dynamic Message Components:
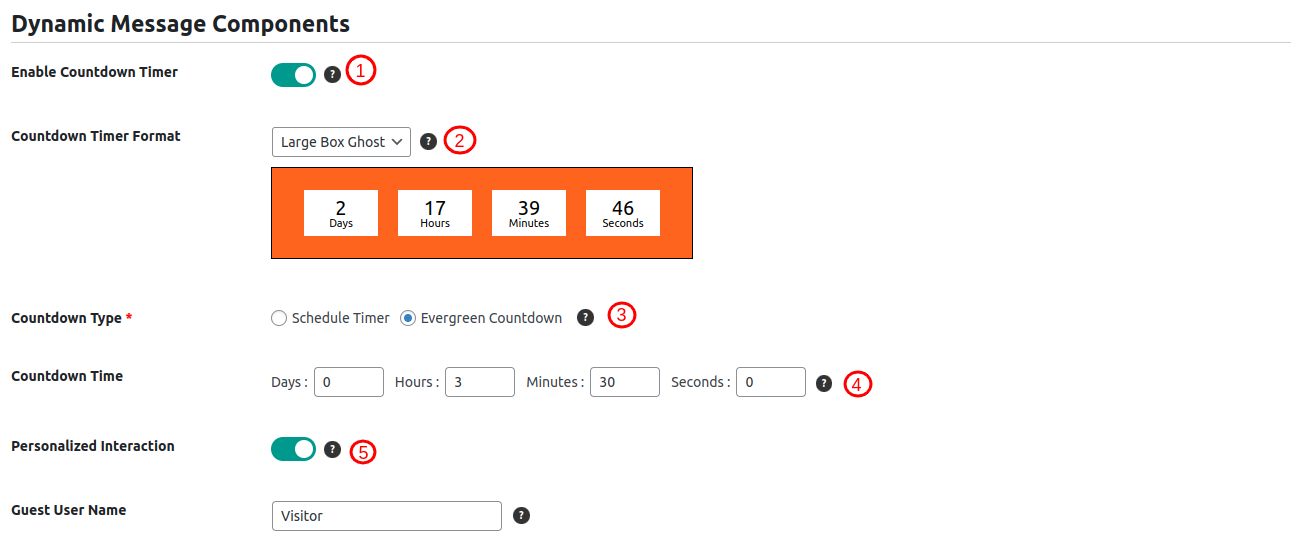
- Enable Countdown Timer: This toggle switch allows you to activate or deactivate the countdown timer.
- Countdown Timer Format: This field provides you with a drop-down menu where you can choose the style for the Countdown Timer. Additionally, a preview of the selected Countdown Timer style is displayed below the drop-down.
- Countdown Type: This field allows you to choose between two types of countdown timers: Schedule Timer and Evergreen Countdown. If you select Evergreen Countdown, an additional field, ‘Countdown Time’, will be displayed.
- Countdown Time: In this field, you can configure the Evergreen Countdown Timer by specifying values in the ‘Days,’ ‘Hours,’ ‘Minutes,’ and ‘Seconds’ input fields.
- Personalized interaction: This field helps to give a personalized message. The {user} placeholder can hold the customer’s name, and for non-logged-in users, a “Guest username” field is provided.
Message Control:

- This setting is available for each individual cart message.
- When enabled, it ensures the cart message will not apply to out-of-stock products, even if the global setting includes them.