Before starting, ensure that you must have a premium ChatGPT account to create an API key. Please upgrade your account if you haven’t done so already. Once you’re done please follow the steps below to get AI recommendations
ChatGPT API Key setup
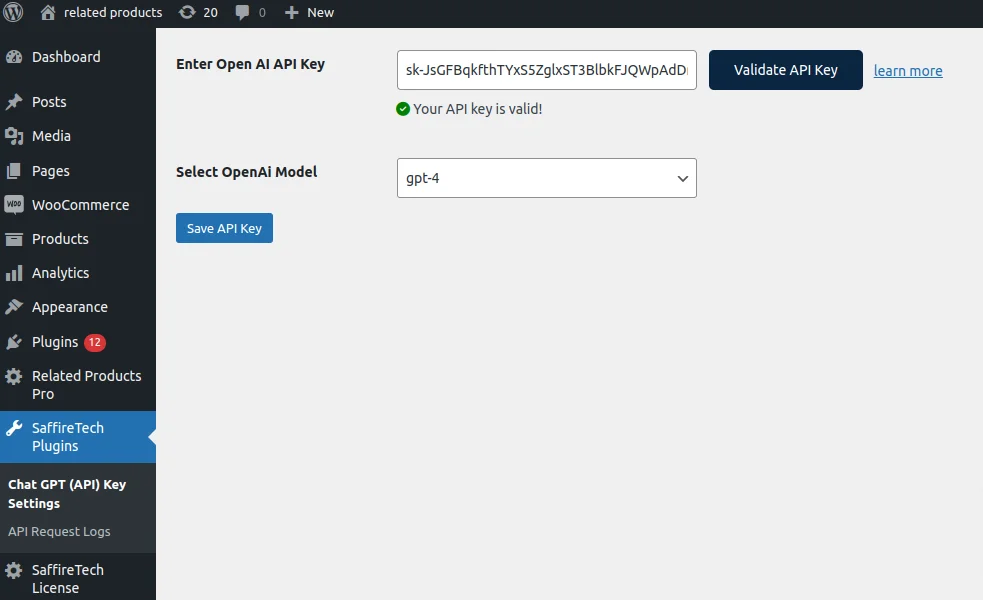
- After installing the Related Products Pro for WooCommerce plugin, on your WordPress dashboard, go to SaffireTech Plugins ->Chat GPT (API) Key Settings. Here you will be asked to enter your Open AI API key and choose its model.
- Enter your API Key that you had saved earlier, and click the “Validate API key” button. It will take a quick second to check the validity of your API Key. You will get a validation message there itself.
- Next, select your desired ChatGPT model. This model will be responsible for processing your requests. Finally, click the “Save Settings” button to save your API Key and selected ChatGPT model.
Getting AI Product Recommendations for products
Once you have successfully configured the ChatGPT API Key, we are ready to get product recommendations using AI.
Here, we’ll take the example of a Sports equipment outlet to demonstrate the settings on how to use the AI functionality.
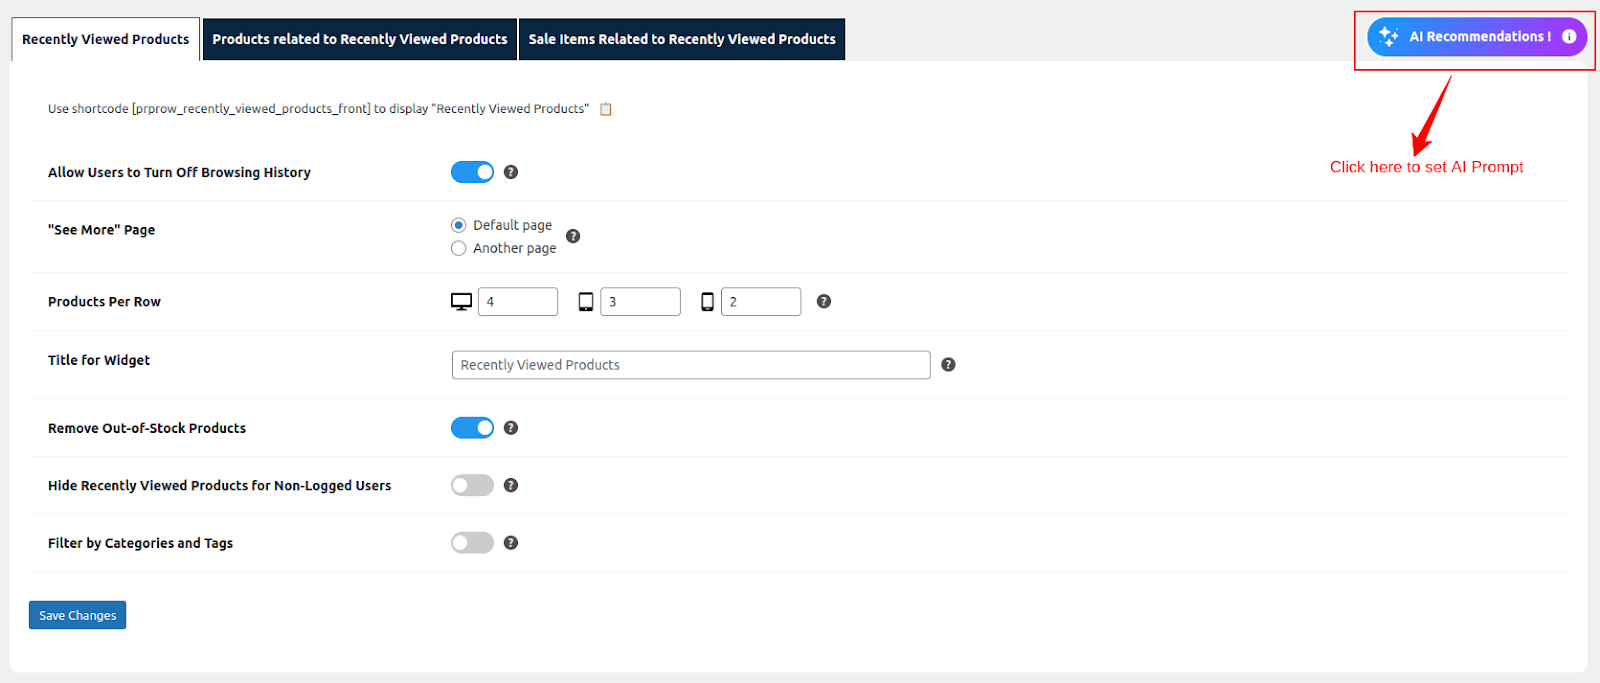
- First Visit Dashboard > ‘Product Recommendations Pro’ here you will find a button that says ‘AI Recommendations’ on the top right corner of the screen. Click on it and a pop-up for initiating the AI Product Recommendation process will be displayed.
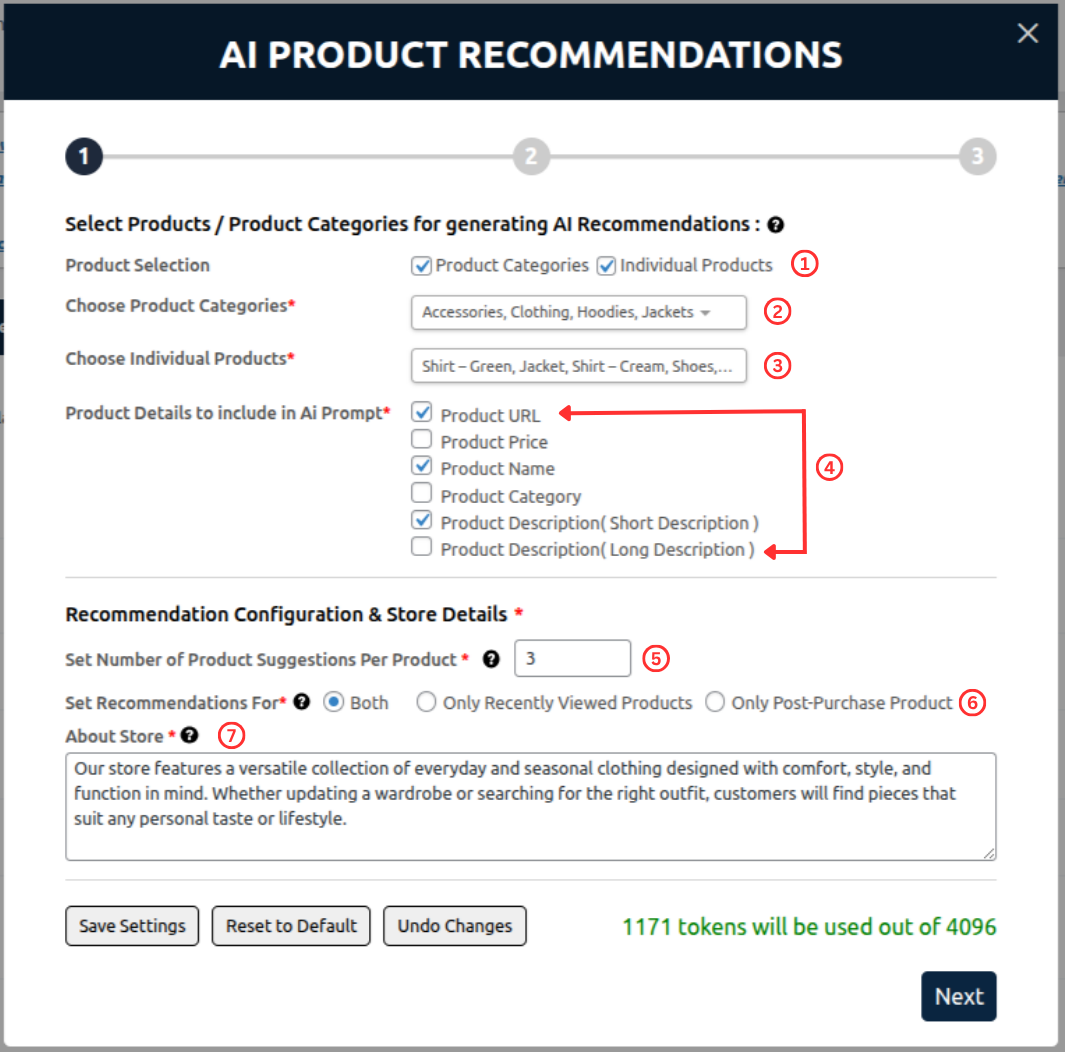
Step 1: The first step involves selecting Products or Product Categories for generating AI recommendations, along with configuring Recommendation Settings and Store Details.
- Select Products / Product Categories for generating AI Recommendations
- Product Selection:
This allows you to customize the prompt by either selecting categories or individual products for the AI to consider when making recommendations. - Choose Product categories:
This option lets you select specific categories to focus on for recommendations. For example, if you choose Clothing and Hoodies, the AI will generate product suggestions primarily from these categories. - Choose Individual Product:
You can manually select specific products from your store that you want the AI to include in the recommendations. - Product Details to include in Ai Prompt:
This section allows you to specify what product details should be included in the AI prompt to help the AI generate more relevant recommendations. Options include: Product URL, Product Name, Product Price, Product Description (Short Description), Product Description (Long Description), Product Category
- Product Selection:
- Recommendation Configuration & Store Details:
- Recommendation count:
This setting allows you to set the number of recommendations to display for the selected products. - Recommendation Set For:
This setting allows you to choose when the recommendations should be shown.- Both: Show the same recommendations both when the user views a product and after they purchase it.
- Only Recently Viewed Products: Show recommendations when the user views the product.
- Only Post Purchase Products: Show recommendations after the user has purchased the product.
- About Store: This setting ensures that the AI engine is optimized for a WooCommerce environment, allowing the AI to better understand the structure and behavior of your store
- Recommendation count:
Step 2: The second step is to schedule and save the AI-generated recommendations.
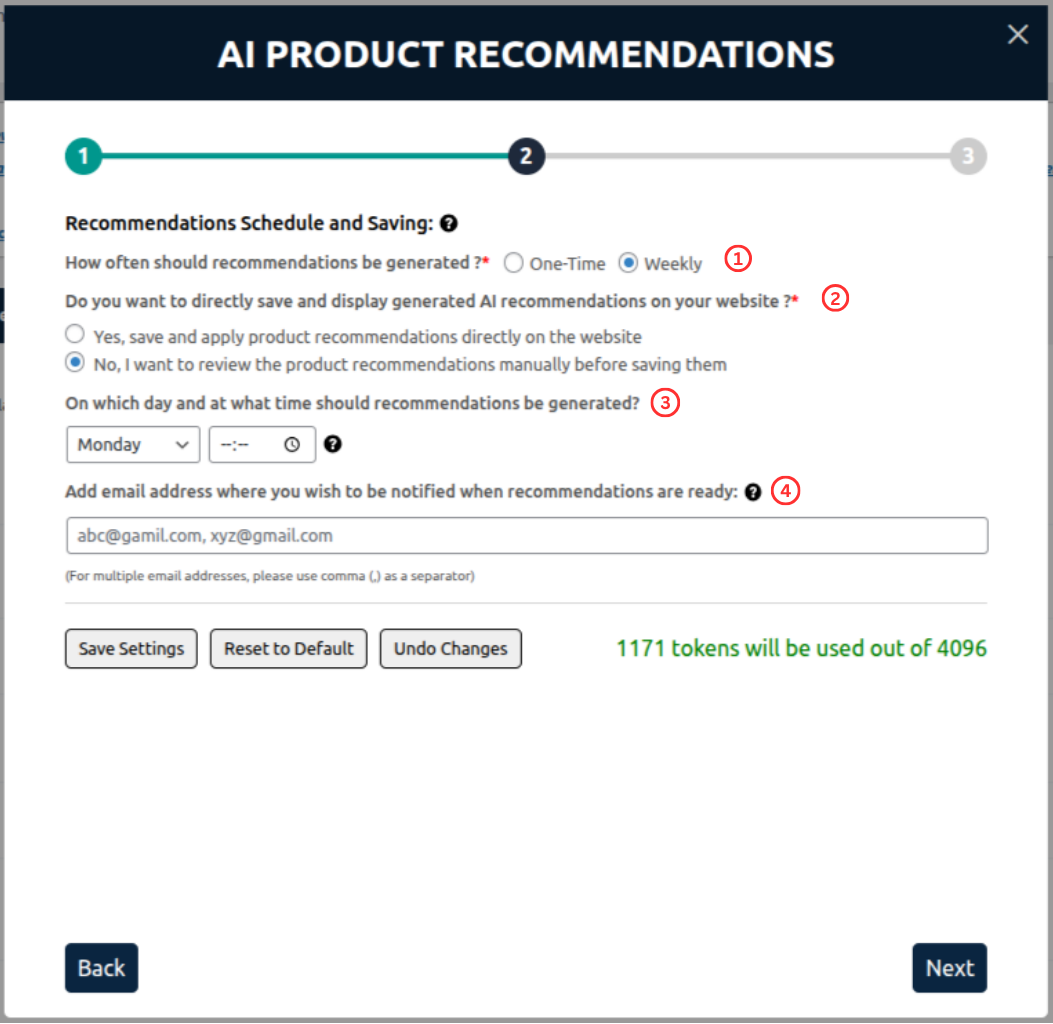
- Recommendations Recurrence:
This setting controls how often AI-driven recommendations should be generated.- One-Time: Recommendations are generated once and will not be updated automatically.
- Weekly: Recommendations are updated every week, ensuring the displayed products stay relevant.
- Save Recommendations:
This setting controls how recommendations are saved and updated.- Automatic (Yes): Recommendations are saved automatically after the AI generates them.
- Manual (No): You will have to manually save the generated recommendations before they are displayed.
- Schedule Day and Time:
This allows you to schedule the day and time for when the AI should refresh and save new product recommendations. Choose the day of the week when the AI will update recommendations. Set the specific time of day when the AI will update the recommendations. - Notification Email:
This field allows you to enter one or more email addresses to receive notifications or reports related to AI recommendations. Multiple email addresses can be separated by commas. By default, the admin email is used.
Step 3: The third step is to add additional information to the AI prompt. This step is optional but can help the AI generate more relevant recommendations.

- Include Sale Data: This setting allows you to include your store’s sales data in the AI prompt. If the checkbox is selected, you’ll need to choose the sales interval.
- Set Sale Interval: This setting lets you define the time range from which sales data should be included. You can select a custom date range using a date picker (maximum period allowed is 1 year).
- Add Extra Instruction: You can add custom instructions to guide the AI. These instructions help the AI generate recommendations in the intended direction.
Prompt Management Settings:
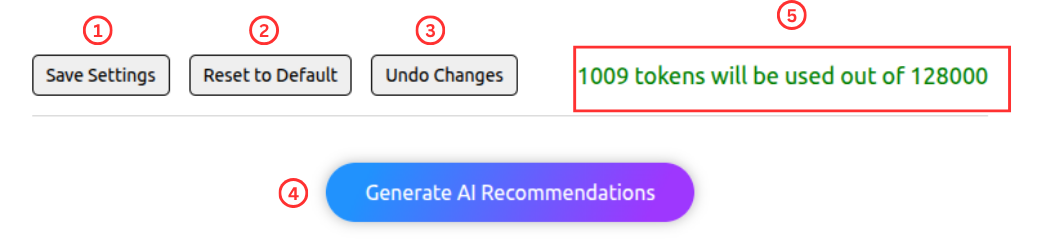
- Save Settings: Saves all current configurations without sending a recommendation request to the AI. This action only stores your settings.
- Reset to Default: Resets all settings back to their original default values.
- Undo Changes: Reverts any unsaved changes made since the last save.
- Generate AI Recommendations: Saves the current settings and sends a request to generate AI-powered product recommendations.
- Token Usage: Displays the number of tokens used in the AI prompt, along with the maximum token limit based on the selected ChatGPT model.